12 Best Ways to Save Money by Brewing Your Own Beer
Updated on: by Amy Kennedy
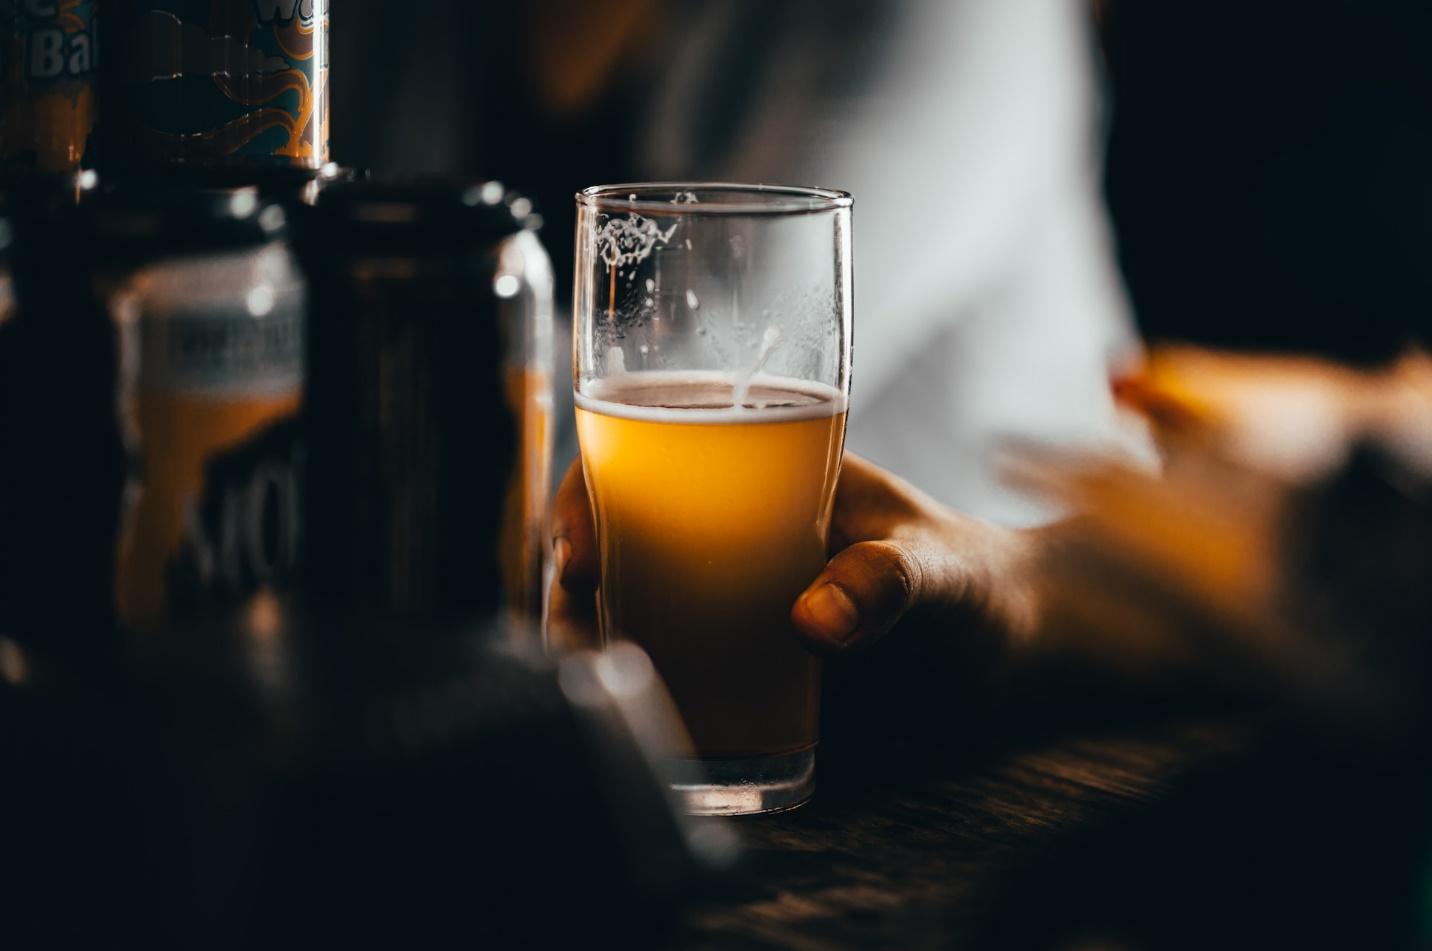
Picture this: savoring a pint of your very own handcrafted brew, customized to your unique palate, all while knowing that you’ve bypassed the high costs of commercial beers.
Need Easy Extra $350+/Month For Free?
- SwagBucks: Watch videos, take surveys, shop and more to earn real money. Earn up to $35 per survey! No hidden fees and completely free. Join Swagbucks Now to Get $5 Free
- InboxDollars: Has so far paid its members over $40 Million. Watch videos, take surveys, shop and more. Join InboxDollars Now and Get Free $5
- SurveyJunkie: Make $5-$25 in your spare time from home to take online surveys, participating in a Focus Groups and trying new products. Join SurveyJunkie Now
- Branded Surveys: Complete online surveys. Collect points. Redeem your points for cash & gift cards. No hidden fees and completely free! Has so far paid its members over $18 Million. Join Branded Surveys Now
Brewing your own beer allows you to unleash your creativity, experiment with flavors, and embark on a fulfilling journey that both beer enthusiasts and frugal individuals can appreciate.
This blog post delves into the secrets of how to save money by brewing your own beer, uncovering the steps, tips, and tricks that will empower you to become a master brewer while keeping your wallet happy.
What Are The Main Ingredients Of Beer Making?
Beer, the beloved beverage enjoyed by millions around the world, owes its complex flavors and refreshing qualities to a carefully selected blend of ingredients.
Understanding these essential components is key to mastering the art of homebrewing.
So, let’s dive into the main ingredients that make beer brewing a fascinating and flavorful experience.
1. Water
Water forms the foundation of every beer recipe, comprising more than 90% of the final product.
Its quality, mineral content, and pH levels play a crucial role in determining the taste, mouthfeel, and overall character of the beer.
Different regions and water sources contribute unique flavors, making it an intriguing aspect to consider when crafting your brew.
2. Malted Barley
Barley, a cereal grain, is the primary source of fermentable sugars in beer.
To prepare it for brewing, barley undergoes malting, a process where it is soaked, germinated, and then dried in a kiln.
This transformation activates enzymes that convert starches into fermentable sugars. Malted barley provides the foundation for the beer’s color, body, and sweetness.
3. Hops
Hops, the flower cones of the Humulus lupulus plant, are responsible for adding bitterness, aroma, and flavor to beer.
These small, green cones contain essential oils and resins that contribute a wide range of characteristics, from floral and citrusy notes to herbal or spicy undertones.
Hops also act as a natural preservative, balancing the sweetness of the malted barley and aiding in the beer’s stability.
4. Yeast
Yeast is the magical microorganism that transforms the sugars in the malted barley into alcohol and carbon dioxide through the process of fermentation.
Need Easy Extra Cash?
Pinecone Research, a leading name in online survey panel honesty, absolutely guarantees $3 cash for every survey you complete!
Take advantage of their time limited New Membership drive and register NOW. Join today: 100% free!
Join Pinecone Research Now
There are two primary types of yeast used in brewing: ale yeast (Saccharomyces cerevisiae) and lager yeast (Saccharomyces pastorianus).
Each imparts its own distinct flavors and works best at specific fermentation temperatures.
Yeast also influences the beer’s aroma, clarity, and overall character.
Steps for Making Beer At Home
Making beer at home can be a rewarding and enjoyable experience.
While the process may seem intricate, breaking it down into manageable steps will help you navigate through each stage with confidence.
Here’s a step-by-step guide to brewing your own beer at home:
1. Gather Your Equipment
To begin your brewing journey, it’s essential to gather the necessary equipment for a successful brewing session. Some key items you’ll need include:
Fermenter
The fermenter is where the magic of fermentation happens.
Options range from glass carboys to plastic buckets with airtight lids.
Ensure it’s clean and sanitized before use.
Airlock
An airlock is a small device that allows carbon dioxide to escape during fermentation while preventing contaminants from entering.
It fits onto the fermenter’s lid and provides a visual indication of active fermentation.
Brewing Pot
A large pot is required for boiling the ingredients.
Opt for a stainless steel or enamel-coated pot to avoid any metallic off-flavors.
Thermometer
A reliable thermometer helps monitor and control temperatures throughout the brewing process.
It ensures proper mashing, boiling, and fermentation temperatures.
Siphoning Tool
A siphoning tool, such as a racking cane or an auto-siphon, is used to transfer beer between vessels while minimizing oxygen exposure.
Bottles or Kegs
You’ll need bottles or kegs to store your finished beer.
Choose glass or PET bottles with airtight seals or invest in a kegging system if you prefer kegging.
Sanitization Supplies
Maintaining proper cleanliness is crucial for preventing contamination.
Use a food-grade sanitizer, such as Star San, to clean and sanitize all equipment thoroughly.
Ensure you have these essential items in place before starting your brewing adventure.
Having everything ready will streamline the process and make your brewing experience more enjoyable.
2. Choose Your Recipe
Once you have your equipment ready, it’s time to select a beer recipe that suits your taste and skill level.
Numerous resources are available for finding recipes, such as brewing books, online brewing communities, and recipe databases.
Online Brewing Communities
Online brewing communities, like Homebrewtalk, offer recipe-sharing platforms where brewers exchange and discuss their recipes.
These platforms often include user ratings and reviews, providing insights into the quality and success of different recipes.
Recipe Databases
Websites such as BeerSmith and Brewtoad host extensive recipe databases with various beer styles and clones of popular commercial beers.
These platforms allow you to search for recipes based on style, ingredients, or even specific beer names.
Earn Everything… nearly!
Join Opinion Outpost, one of the few faithful and honest survey panels and earn cash and gift cards for your opinion. Stack your points and redeem them: Simple! No hidden fees and completely free!
Join Opinion Outpost Now
Brewing Books
Brewing books authored by renowned brewers, such as “How to Brew” by John Palmer and “Designing Great Beers” by Ray Daniels, provide comprehensive guides that include recipes along with valuable insights and techniques.
When choosing a recipe, consider your brewing experience, available ingredients, and the beer style you wish to brew.
Reading reviews and feedback can help you gauge the recipe’s success and make an informed decision.
Once you have a recipe in hand, it’s time to move on to the next step: sanitizing your equipment.
3. Sanitize Your Equipment
Maintaining cleanliness and sanitization throughout the brewing process is crucial to prevent any unwanted contaminants from affecting the quality of your beer.
Sanitize all your brewing equipment, including fermenters, airlocks, siphoning tools, and bottles.
Use a food-grade sanitizer, such as Star San, following the manufacturer’s instructions.
Ensure that all surfaces that come into contact with the beer are properly sanitized to eliminate any potential bacteria or wild yeasts that could spoil the batch.
4. Mashing and Lautering
Mashing and lautering are integral steps in extracting the sugars from the malted barley and creating the sweet liquid known as wort.
Mashing involves mixing crushed malted barley with hot water in a vessel called a mash tun.
This process activates enzymes present in the malt, converting starches into fermentable sugars.
The mixture is typically held at specific temperatures for an allotted time to optimize sugar extraction.
Lautering is the process of separating the liquid wort from the solid grain material.
It is achieved by slowly rinsing the mashed grains with hot water, allowing the wort to flow through a filter bed, such as a false bottom or mesh screen, while leaving behind the grain husks.
5. Boiling the Wort
Once the wort is extracted from the grain, it’s time to bring it to a boil. Boiling the wort serves several important purposes in the brewing process.
Firstly, boiling helps sterilize the wort, killing off any remaining bacteria, enzymes, or wild yeast that may have survived the mashing and lautering stages.
This is crucial for ensuring a clean and stable fermentation.
Secondly, during the boil, hops are added to the wort. Hops contribute bitterness, aroma, and flavor to the beer.
The heat from the boil extracts the bittering compounds and aromatic oils from the hops, balancing the sweetness of the malt and adding complexity to the beer’s taste profile.
Boiling also helps coagulate proteins, forming a trub (coagulated matter) that will later be removed.
This process aids in the clarity of the final beer. Additionally, boiling allows for concentration and color development in the wort.
The wort is typically boiled for about 60 to 90 minutes, with hops added at specific intervals based on the desired bitterness and flavor profile.
Boiling the wort is a crucial step that sets the stage for the subsequent fermentation and ultimately determines the characteristics of the finished beer.
6. Add Hops
Hops play a vital role in brewing, adding bitterness, aroma, and flavor to the beer.
There are various methods and timings for adding hops during the brewing process.
During the boil, hops are added at different intervals to achieve desired bitterness, flavor, and aroma characteristics.
The specific hop additions depend on the beer style and personal preference.
Bittering hops, added early in the boil, extract bitterness due to the longer exposure to heat.
They contribute to the overall balance of the beer. Flavor hops, added towards the middle of the boil, impart additional flavor characteristics, such as floral, citrusy, or spicy notes.
Aroma hops, added near the end of the boil or during whirlpooling, provide delicate aromas that enhance the beer’s aroma profile.
The choice of hop varieties and the timing of their addition allow for a wide range of flavors and aromas in your homebrew.
Experimenting with different hop combinations can lead to exciting and unique beer experiences.
7. Cool the Wort
After the boil, it’s essential to cool the wort quickly to a temperature suitable for fermentation.
Rapid cooling serves multiple purposes in the brewing process.
First, it helps prevent the growth of unwanted microorganisms by reducing the time the wort spends at temperatures favorable to bacterial or wild yeast contamination.
Secondly, cooling the wort aids in protein coagulation and the precipitation of unwanted solids, resulting in a clearer beer.
Finally, quick cooling helps to preserve delicate hop aromas by minimizing their volatilization during the cooling process.
There are various methods for cooling the wort, including immersion chillers, counterflow chillers, and plate chillers.
These devices circulate cold water or coolant around the wort, rapidly lowering its temperature to the desired range for fermentation.
Proper cooling of the wort is crucial to maintain the quality and stability of the beer.
It sets the stage for the next step: transferring the cooled wort to a fermenter.
8. Transfer to a Fermenter
Once the wort has been cooled, it’s time to transfer it to a fermenter, where the magic of fermentation will take place.
Follow these steps:
- Ensure the fermenter is properly sanitized to maintain a clean environment for the yeast to work.
- Using a siphoning tool, carefully transfer the cooled wort from the brewing pot to the fermenter, taking care not to introduce any contaminants.
- Avoid splashing or excessive aeration during the transfer, as oxygen exposure at this stage can negatively impact the flavor and shelf life of the beer.
9. Pitch the Yeast
Pitching the yeast refers to adding a selected strain of brewer’s yeast to the fermenter.
This is a crucial step as the yeast will ferment the sugars in the wort, converting them into alcohol and carbon dioxide.
Here’s how to pitch the yeast:
- Ensure the yeast is healthy and viable by following the manufacturer’s instructions for rehydration, if necessary.
- Once the yeast is ready, gently sprinkle or pour it into the fermenter containing the cooled wort.
- Seal the fermenter with an airlock to allow carbon dioxide to escape while preventing contaminants from entering.
The choice of yeast strain will significantly influence the beer’s flavor profile, aroma, and fermentation characteristics.
Different strains of yeast are available for ales and lagers, each requiring specific fermentation temperatures and conditions.
10. Fermentation
Fermentation is the magical process where yeast consumes the sugars in the wort, producing alcohol and carbon dioxide.
Here’s what happens during fermentation:
- The fermenter should be placed in a temperature-controlled environment, ideally within the yeast’s recommended temperature range.
- As fermentation progresses, you will notice bubbles and a thick layer of foam forming on top of the wort. This is a sign of active fermentation.
- Depending on the beer style and yeast strain, fermentation can last anywhere from a few days to several weeks.
- It’s important to monitor the fermentation process by checking the airlock activity and taking hydrometer readings to track the progress and determine when fermentation is complete.
During fermentation, the yeast imparts flavors and aromas, and the beer undergoes maturation, developing its unique character.
Patience is key at this stage, allowing the yeast to work its magic and transform the wort into delicious beer.
11. Carbonation and Bottling
Once fermentation is complete, and your beer has reached its desired final gravity, it’s time to carbonate and bottle your homemade brew.
After ensuring your bottles are sanitized, prepare a priming solution by dissolving a measured amount of priming sugar (usually corn sugar) in boiled water.
The amount of priming sugar needed depends on the desired level of carbonation and the beer style.
Transfer the beer from the fermenter to a bottling bucket, taking care to minimize oxygen exposure.
Gently stir in the priming solution to ensure even distribution throughout the beer.
Using a bottling wand or a racking cane attached to a bottling hose, fill each sanitized bottle with the beer, leaving a small amount of headspace to allow for carbonation.
Cap the bottles securely with sanitized bottle caps or use a capping tool if using reusable bottles.
The priming sugar provides fermentable sugars for the remaining yeast in the beer to consume, producing carbon dioxide as a byproduct.
This natural carbonation process takes place within the sealed bottles, resulting in the desired level of carbonation.
Store the bottles in a cool, dark place, ideally at cellar temperature (around 55-65°F or 12-18°C), for a period of time to allow carbonation to occur.
This process typically takes one to three weeks, depending on the beer style and desired carbonation level.
12. Conditioning
After carbonation, it’s important to let your beer condition.
Conditioning is a period of maturation during which flavors meld, and the beer becomes smoother and more well-rounded.
Maintain a consistent temperature during the conditioning period, typically around cellar temperature (55-65°F or 12-18°C).
This allows the beer to develop and mellow, enhancing its overall character.
The duration of conditioning depends on the beer style and personal preference.
Ales generally require a few weeks of conditioning, while lagers may benefit from longer conditioning periods, often several weeks or months.
During this time, flavors continue to develop, any harsh or off-flavors mellow out, and the beer achieves optimal taste and aroma.
Wrap Up
In conclusion, the process of brewing your own beer at home is an exciting and rewarding journey.
We’ve explored the essential steps and key considerations involved in creating your homemade brew, from gathering the necessary equipment to enjoying the final product.
Through each stage of the brewing process, attention to detail, patience, and creativity come together to produce a beer that reflects your personal taste and brewing skills.
Whether you’re a beginner or an experienced homebrewer, the joy of creating your own unique brew is unparalleled.
Related Posts:
- 20 Best Ways to Save Money by Planning Your Own Wedding
- 10 Ways to Save Money by Making Your Own Cleaning Products
- 7 Ways to Save Money by Switching to Solar Energy
- Tips to Save Money with Your Own Vegetable Garden
- Save Money by Cutting Out These 14 Common Unnecessary Expenses
Earn Everything… nearly!
Join Ipsos iSay, one of the few Faithful and Honest survey panels and earn prizes, gift cards and donations. Stack your points and redeem them: Simple! No hidden fees and completely free!


Comments
Click here to post a comment...
Post comment